How to Create Your Own DIY Farmhouse Christmas Gnome Sign Step by Step Kit Guide
- Shelbe Brooks
- Aug 2, 2025
- 3 min read

Updated: Aug 20, 2025

Decorating your home for the holiday season is a wonderful tradition that brings warmth and cheer!
If you're looking for a fun and engaging project to add a personal touch to your decorations, creating a DIY farmhouse Christmas gnome sign is the perfect solution!
This step-by-step guide will take you through the process of making your own festive sign, perfect for displaying in your home or giving as a thoughtful gift.
What's in The Kit?
Everything you need is in the box!

• Wood cutting board-style sign base
• Laser-cut Christmas gnome, tree, snowflake, and ornament cutouts
• Mod Podge (sealant & base prep)
• Premium holiday paint palette
• Dropper for engraved details
• Paintbrushes and simple instructions
Lay out your items on a covered surface. Take a moment to plan your colors!
Step 1: Prep the Wood Board with Mod Podge

Use a brush, apply a thin layer of Mod Podge over the surface of your board.
This step will help your painted cutouts adhere well and provide a sealed finish.
Let the Mod Podge dry for about 5 to 10 minutes. This ensures a strong bond between the wood and the cutouts you're about to create.
Step 2 : Paint the Cutouts
Next up is the painting phase!
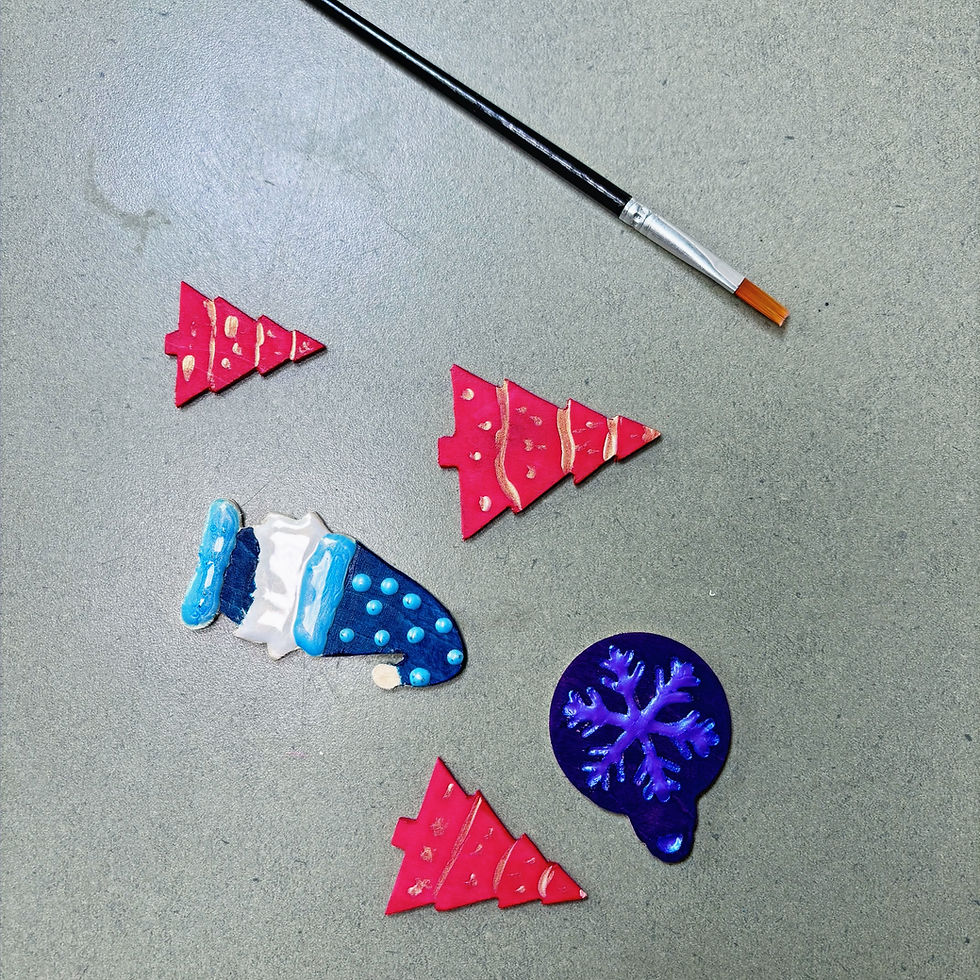
Take your gnome and accessory cutouts, and begin to apply your chosen paints.
Start painting your gnome and accessory cutouts.
We chose Winterberry Frost Premium Color Palette but we recommend you choose your own festive color scheme!
Remember, the beauty of a DIY project is that there are no wrong choices, if you love it, it’s perfect! Make sure to use thin layers of paint for a smooth finish.
Allow each layer to dry completely before adding another coat if needed.
Step 3: Add Color to the Engraving Using the Dropper
Our kits make it easy with paint pre-mixed to the perfect consistency and ready
to use in precision droppers.
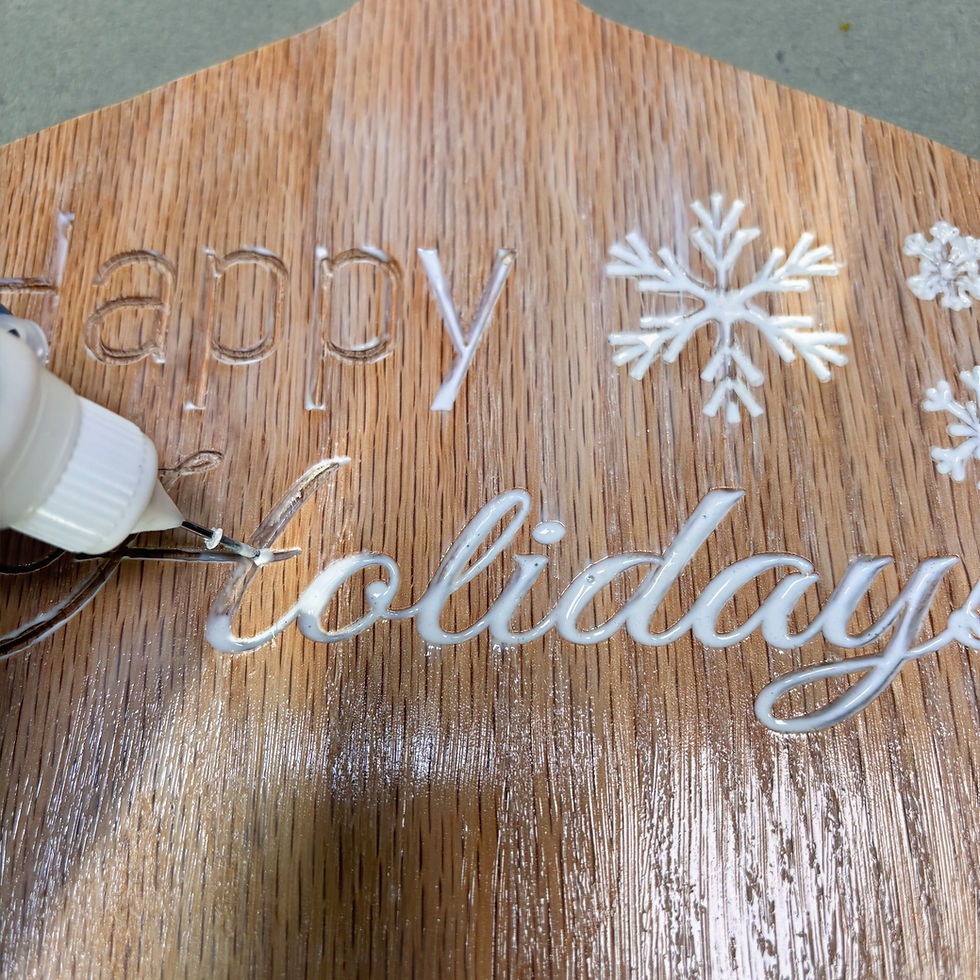
Just drip the color into the engraved areas for a bold, vibrant design.
Blend shades for a custom look or keep it classic. Craft your way!
This technique can create stunning visual effects, allowing the colors to stand out beautifully.
Allow the paint to dry thoroughly before moving to the next step.
Step 4: Glue on the Painted Cutouts
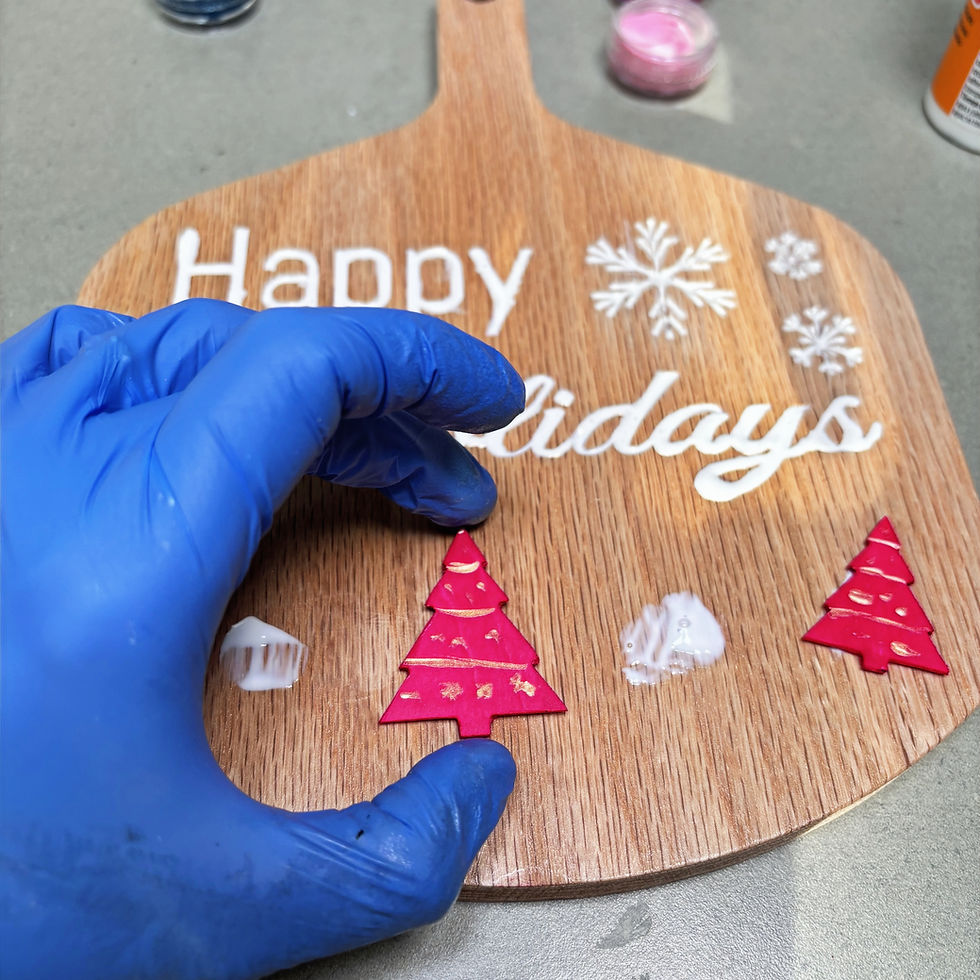
It's time to bring your sign together! Once all components are dry, take your glue and secure each painted cutout to the board.
Start by positioning the gnome in the center, followed by flanking it with pretty trees and colorful ornaments.
Ensure the placement feels balanced and pleasing to the eye. This is your chance to arrange the elements creatively!
.
Step 5: Seal Your Project
The final step is crucial for ensuring the longevity of your DIY masterpiece.
Apply a final coat of Mod Podge over the entire project.
This extra layer will seal and protect your sign, making it suitable for display during the holiday season!
Allow it to dry completely before showcasing it in your home or gifting it to a loved one.
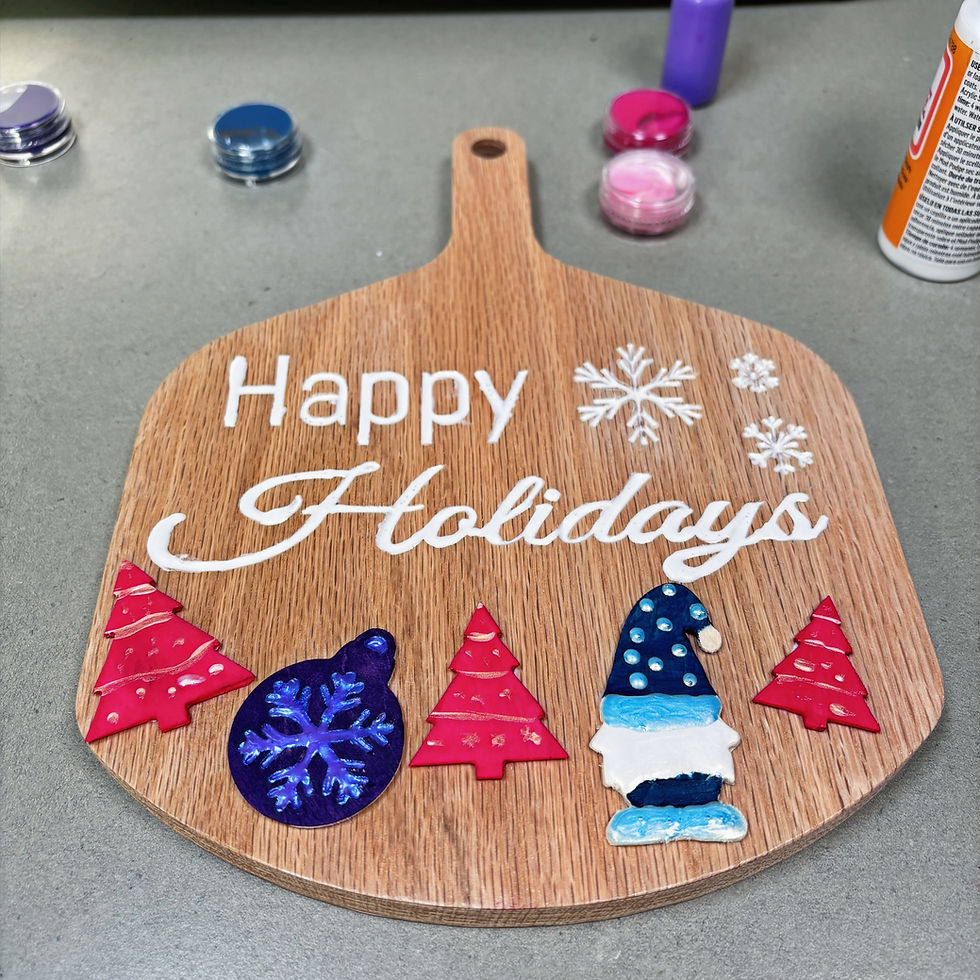
Finished Look
Congratulations! Your one-of-a-kind holiday décor piece is ready to shine!

With just a few steps, you have created a charming farmhouse Christmas gnome sign that reflects your personal style.
Whether you hang it on your door, place it on a mantelpiece, or gift it to someone special, it's sure to spread joy and festive cheer!
Creating your own holiday sign adds not only a personal touch to your decorations but also creates lasting memories through the crafting process.

Don't forget to share your finished creation with friends and family or even consider hosting a DIY crafting night!
Whether you're an experienced crafter or trying something new, this step-by-step guide simplifies the process of creating a beautiful farmhouse Christmas gnome sign that you can be proud of.
Happy crafting!
P.S. Tag us in your photo of your creative project @CrazyCraftCreations to be featured on our Facebook Page!


Comments