DIY Mountain Scene Wood Puzzle: Step by Step Kit Guide
- Shelbe Brooks
- Aug 31, 2025
- 2 min read


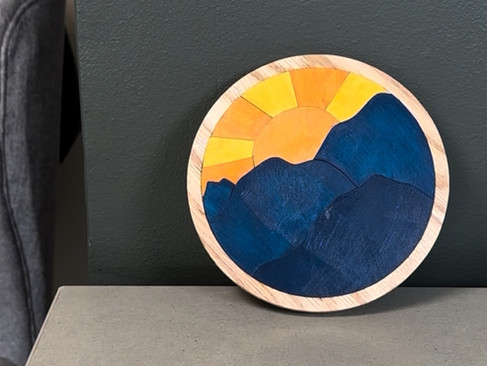
Bring the outdoors in! This beginner-friendly mountain scene kit turns layered laser-cut pieces into textured wall art—perfect for a gallery wall or gift.
What’s in the kit
• Wood backing
• Laser-cut mountain puzzle pieces
• Mod Podge
• Acrylic paints (assorted)
• Paintbrushes
You may also want: paper towels, water cup, scrap paper/silicone mat, low-tack tape, toothpicks for tiny glue spots, optional fine-grit sandpaper.

Estimated time: 45–75 minutes (plus dry time)
Skill level: Beginner
Before you start
• Cover your work surface and keep a damp cloth handy.
• Do a quick dry fit of the puzzle to learn placement. Snap a photo for reference.
Step 1: Paint cutouts your way

1. Separate puzzle pieces by layer (foreground trees, mountains, sky).
2. Paint thin coats; let dry 10–20 minutes between layers.
3. Add details: dry-brush highlights on peaks, deeper greens for trees, a hint of mist.
Pro tip: Keep edges clean. Visible edges add depth.
Step 2: Prep the backing with Mod Podge
1. Brush a thin, even coat over the entire backing.
2. Wait 2–3 minutes so it’s slightly tacky (helps prevent sliding).


Step 3: Glue down the cutouts
1. Place background/sky first, then mountains, then foreground.
2. Press each piece lightly from center outward to remove bubbles.
3. If needed, add a dab of Mod Podge under corners with a toothpick.
Step 4: Seal with Mod Podge
1. After everything is set (5–10 minutes), brush a thin sealing coat across the whole surface.
2. Brush in one direction for a consistent finish.
3. Optional second coat after 20–30 minutes.

Step 5: Done → Style & CTA
Let cure fully (ideally overnight). Frame or hang with command strips.
Color ideas
Evergreen + slate blue + snow white • Moss + charcoal + mist gray • Sunset glow on peak tips.


Care
Dust with a dry cloth. Avoid prolonged moisture/heat.
Troubleshooting
• Pieces won’t stick? Let the backing get tacky first; use a tiny extra dab under edges.
• Cloudy finish? Too thick. It will clear as it dries; use thinner coats next time.
FAQs
Can I sand burn marks on edges? Yes, lightly with fine grit before painting.
Matte or gloss? Mod Podge dries to a soft sheen; add a gloss topcoat if you prefer shine.


Comments