DIY Coffee & Memories Wall Art Kit: Step by Step Guide
- Aug 31, 2025
- 1 min read

For coffee lovers! Warm tones and playful steam lines create a café-worthy accent for your kitchen or coffee nook.
What’s in the kit
• Wood backing
• Coffee-themed laser-cut puzzle pieces
• Mod Podge
• Acrylic paints
• Paintbrushes
Good to have: pencil for layout marks, ruler, paper towels, water cup.
Estimated time: 40–60 minutes (plus dry time)
Skill level: Beginner
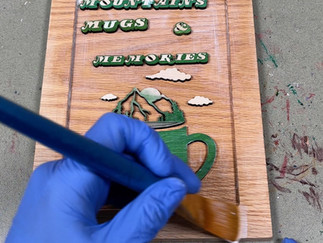
Step 1: Paint cutouts your way

1. Choose a palette: latte beige, espresso brown, cream, mocha.
2. Add foam highlights with a touch of white.
3. Metallic steam lines (optional) add a subtle shine.
Step 2: Prep the backing with Mod Podge
Thin, even coat; let it get slightly tacky (2–3 minutes).


Step 3: Glue down the cutouts
1. Dry fit first (center mugs, stagger beans, add “memories” text).
2. Press from center outward to secure and remove bubbles.
Step 4: Seal with Mod Podge
1. Thin sealing coat across the entire surface.
2. For extra protection in kitchen areas, add a second thin coat after 20–30 minutes.
Step 5: Done → Style & CTA

Display near your coffee station for daily happy vibes.
Pro tips
• Keep brush strokes in the same direction for a clean finish.
• Layer mid-tone → shadow → highlight for dimensional cups.
Variations
Minimalist line art (two colors) • Retro diner palette (teal, cherry red, cream).
Care & FAQs
Dust gently; avoid steam or splashes.
Food safe? This is wall décor; avoid direct food contact.


Comments