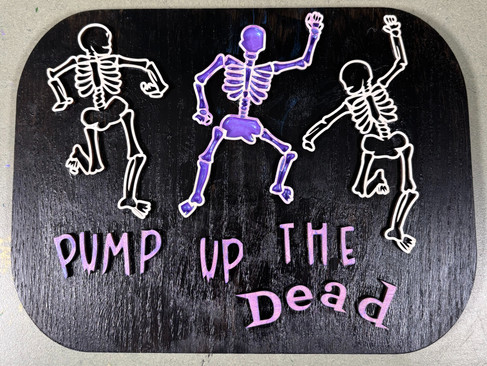
Dancing Skeletons DIY Kit | Step-by-Step Kit Guide
- Shelbe Brooks
- Aug 25, 2025
- 2 min read


Time: 45–60 minutes (plus dry time)
Difficulty: Easy
Best for: Ages 8+ with grown-up help
Kit by: Crazy Craft Creations

What’s in the kit
• Wooden skeleton cutouts (multi-piece)
• Background/backing (if included with your set)
• Mini brads/fasteners (if your kit version includes them)
• Paint pots + paintbrushes
• Mod Podge (sealer)
• Jute rope (for hanging, if backing is included)
You’ll also need (not included)
• Craft glue or hot glue + glue gun
• Paper plate or scrap for paint
• Toothpick or precision tip (detail paint)
• Scissors
• Paper towels / baby wipes
• Optional: glitter, gel pens, fine-liner, clear spray sealer
Step 1 — Prep & Plan (3–5 min)

Protect your surface, lay out all pieces, including the skeletons and letters so you know where everything goes.
Pro tip: Snap a quick photo of your layout so you can reference it.
Step 2 — Paint your Board (8–12 min)

Your kit includes a backing, paint it your way! think night sky, confetti, or checkerboard.
Paint the board using your desired spooky color. A thin coat dries fast and keeps details crisp. Let dry.
Step 3 — Paint your skeletons & letters (6–10 min):

Go classic bone white, glow-in-the-dark, or funky colors! Get creative with it.
Allow paint to dry for 10-20 minutes.
Pro tip: A toothpick makes micro-details easy.
Step 4 — Glue down the cutouts Mod Podge: (8–12 min)

Arrange your cutouts the way you want them positioned beside your board.
Add a layer of mod podge over your board. Then, glue down each cutout with light pressure to secure.
Step 5 — Seal & Sparkle (3–5 min)

Brush on a thin layer of Mod Podge over the letters and skeleton cut outs. Add glitter while tacky if you want shine.
Dry time: 10–20 minutes between coats.
Step 6 — Mount & Hang (3–5 min)

Glue skeletons to the background or add a jute rope hanger to the backing. Let set fully.
Style Ideas
• Disco skeletons: silver accents + starry black background
• Candy colors: pastel bones + sprinkle dots
• Glo-ween: glow paint + neon outlines


Troubleshooting
• Sticky finish: Too thick a Mod Podge coat, use thin layers and let dry longer.
• Warping: Seal front and back of thin backing to balance moisture.
Shop & Share
Ready to make your own? Grab the Dancing Skeletons DIY Kit from Crazy Craft Creations and tag us @crazycraftcreations so we can feature your spooky crew!


Comments